
티스토리 뷰
[Spring Security - JWT] (6) : 재발급 / 로그아웃 API + Postman 테스트
https://ekeprl.tistory.com/67 [Spring Security - JWT] (5) : Refresh Token 구현https://ekeprl.tistory.com/66 [Spring Security - JWT] (4) : 로그인 API 및 Postman 테스트https://ekeprl.tistory.com/65 [Spring Security - JWT] (3) : JwtFilter이전 포
ekeprl.tistory.com
이전 포스팅을 통해 Spring Security - JWT 시리즈를 마무리했다.
이번 포스팅은 Spring AI와 Google Gemini를 연동해 뉴스 요약 기능을 구현해보려 한다.
이번 프로젝트는 단순 데이터 조회를 넘어 AI가 관련 뉴스를 자동으로 요약해 사용자에게 전달하는 기능을 목표로 하고 있다.
이를 위해 Spring AI와 Google Gemini를 연동해 뉴스 요약 기능을 구현해보려 한다.
0. API Key 발급
Google AI Studio
The fastest path from prompt to production with Gemini
aistudio.google.com
구글 AI 스튜디오에서 로그인을 진행하고
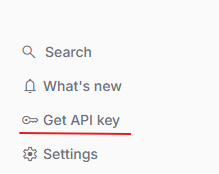
좌측하단에서 Get API key를 발급받는다.
1. Build.gradle.kts
dependencies {
implementation(platform("org.springframework.ai:spring-ai-bom:2.0.0-M4"))
implementation("org.springframework.ai:spring-ai-starter-model-google-genai")
}

repositories {
mavenCentral()
maven { url = uri("https://repo.spring.io/milestone") }
}
가장 먼저 의존성을 추가해 준다.
** Spring AI 2.0.0은 아직 정식 릴리즈 전 Milestone 버전이기 때문에
Maven Central 외에 Spring Milestone 레포지토리를 추가해야 의존성을 받을 수 있다. **
2. application.yml
spring:
  ai:
    google:
      genai:
        api-key: ${GEMINI_API_KEY}
        chat:
          options:
            model: gemini-2.5-flash
api-key 값에 [0. API Key 발급]에서 발급받은 api key를 입력해 준다.
3. AiConfig
@Configuration
class AiConfig {
    @Bean
    fun chatClient(builder: ChatClient.Builder): ChatClient {
        return builder.build()
    }
}
Config에서는 ChatClient Bean을 등록한다. Spring AI가 자동으로 Gemini 모델과 연결된 ChatClient.Builder를 주입해 준다.
4. AiService
@Service
class AiService(
    private val chatClient: ChatClient,
) {
    fun summarize(content: String): String? {
        return chatClient.prompt()
            .user("다음 뉴스를 3줄로 요약해줘:\n\n$content")
            .call()
            .content()
    }
}
Service에서는 ChatClient를 통해 Gemini에 프롬프트를 전달하고 응답을 반환한다.
5.AiController
@RestController
@RequestMapping("/ai/news")
class NewsSummaryController(
    private val aiService: AiService,
) {
    @PostMapping("/summarize")
    fun summarize(@RequestBody request: AiRequestModel): ApiResponse<String> {
        val result = aiService.summarize(request.content)
        return ApiResponse.success(result)
    }
}
/ai/news/summarize는 인증된 사용자만 접근 가능하다.
SecurityConfig의. anyRequest(). authenticated()에 포함되기 때문에 별도 설정이 필요 없다.
6.Postman 테스트
[Spring Security - JWT] (4) : 로그인 API 및 Postman 테스트
https://ekeprl.tistory.com/65 [Spring Security - JWT] (3) : JwtFilter이전 포스팅을 통해 JWT 토큰의 생성과 검증을 담당하는 JwtUtil을 작성했다.https://ekeprl.tistory.com/64 이번 포스팅은 매 요청마다 JWT 토큰을 검증
ekeprl.tistory.com
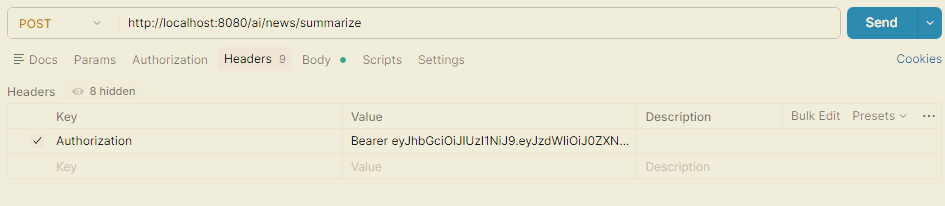
여기서 로그인 시 발급되는 토큰의 값을 그대로 Header에 입력한다.
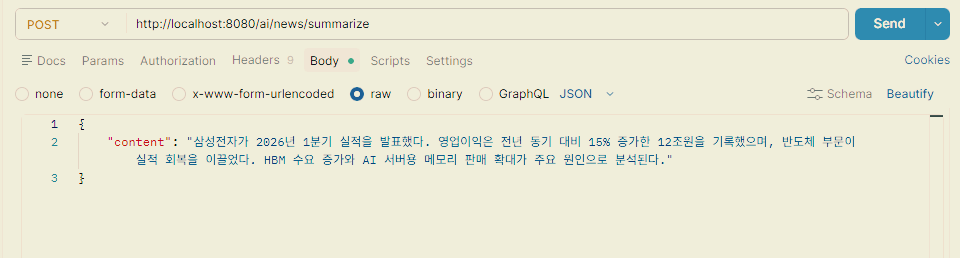
Body에는 원하는 뉴스를 입력하고 Send를 진행하면

다음과 같이 출력되는 것을 확인할 수 있다.
이상으로 Spring AI - Gemini 뉴스 요약 구현을 알아보았습니다.
감사합니다.
'Project > Stockly' 카테고리의 다른 글
| [Stockly] (5) : React 프론트엔드 환경 설정 (0) | 2026.07.08 |
|---|---|
| [Spring AI] (4) : 텔레그램 봇 연동 - 목표가 알림 구현 (0) | 2026.07.07 |
| [Spring AI] (3) : 관심 종목(Watchlist) CRUD 구현 (0) | 2026.06.30 |
| [Spring AI] (2) : Yahoo Finance 연동 - 주식 가격 조회 구현 (0) | 2026.06.30 |
- Total
- Today
- Yesterday
- null
- Powershell
- insert
- 서버호스트
- spring ai
- springsecurity
- dependencies
- 백엔드
- kotlin
- securityconfig
- Insert오류
- MariaDB
- session저장
- ubuntu
- dbeaver
- Spring Security
- CRUD
- Git
- gradle
- AI
- 의존성
- jwt
- JAR매니패스트
- InetAddress
- 명령줄이 너무 깁니다
- 특일정보
- Postman
- 게시판
- Column count doesn't match value count at row 1
- GitHub
| 일 | 월 | 화 | 수 | 목 | 금 | 토 |
|---|---|---|---|---|---|---|
| 1 | ||||||
| 2 | 3 | 4 | 5 | 6 | 7 | 8 |
| 9 | 10 | 11 | 12 | 13 | 14 | 15 |
| 16 | 17 | 18 | 19 | 20 | 21 | 22 |
| 23 | 24 | 25 | 26 | 27 | 28 | 29 |
| 30 | 31 |